Timeline - A Conceptual Knit

Saturday, October 05, 2013


Hurricane Sandy, historic blizzard Nemo, Whitey Bulger trial and the Marathon bombing - a lot happened to Boston this past year. I purposely say “to” Boston rather than “in” Boston because each event took a toll on the collective psyche of everyone who claims Boston or the surrounding areas as home (Boston is so much more than its city limits).

“Boston Strong” became not just a rally cry but a mantra to remind ourselves that in addition to strength we also have the will and the power to endure bad things and move into the future better and wiser. One coping mechanism for many Bostonians was to get away from it all by attending or watching a sporting event. The Red Sox, Patriots, Celtics, Bruins and Revolution all provided hours of escape and entertainment.

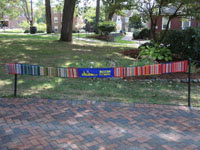
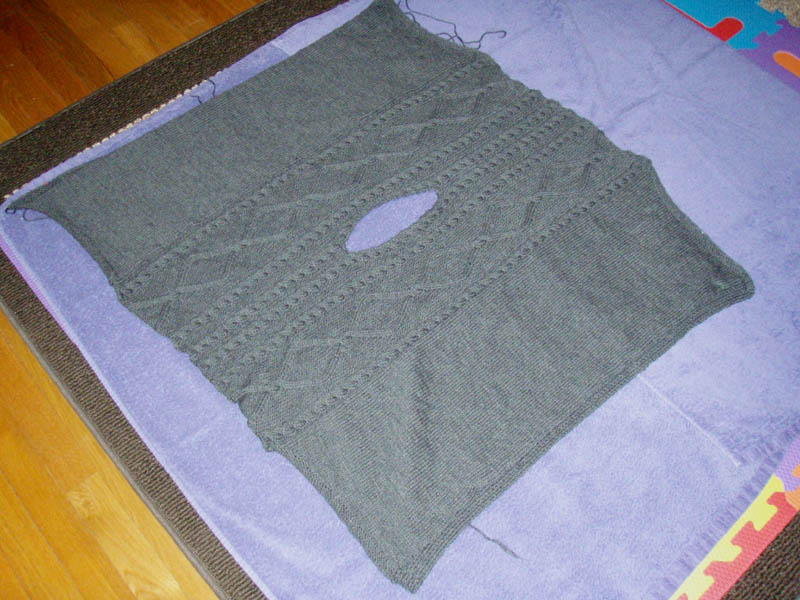
Timeline is a conceptual knit I designed and knit for the Yarn Graffiti event by the Fashion Design and Retailing Department. It was displayed on the Framingham State University campus from September 16th thru September 27th.

This conceptual knit design records the results of Boston's professional sports teams during the past year.

Between September 1, 2012 (on the left) and August 31, 2013 (on the right), colored ridges were added successively to the right edge to represent wins and losses.

Naturally, wins by the Red Sox are red. The Celtics are green; the Bruins are gold; and the Patriots and Revolution are navy blue (soccer IS football so the Revolution and Patriot games are both counted as such). Losses by any team are colored gray.

The twelve colored blocks along the upper and lower edges each correspond to one calendar month.

A break in the pattern occurs on April 15, 2013, which was the day of the Boston Marathon. The knitted panel, showing the Boston skyline and the words "Boston Strong" was designed by Lisa McFetridge to honor the marathon victims, and is included here with her permission.

Conceptual knitting was developed by Lea Redmond of Leafcutter Design in Berkley, California and encourages the knitter to explore whimsy and adventure in knitting.

Yarn Graffiti at Framingham State University

Friday, October 04, 2013

Thanks to everyone who answered this call to participate!

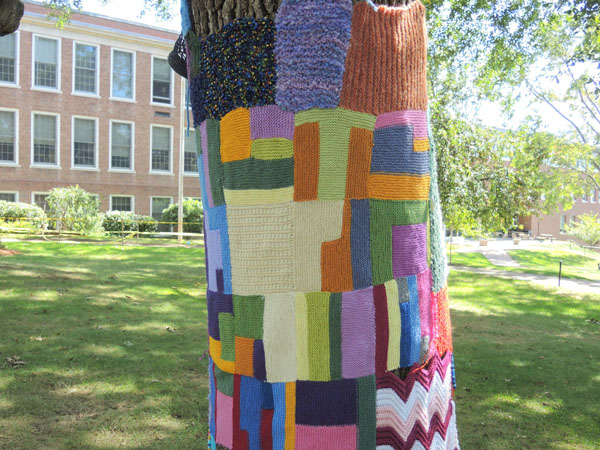
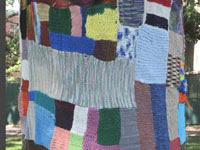
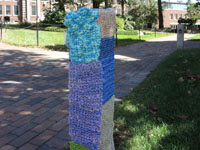
The yarn graffiti was a community art installation celebrating the creation of the new Fashion Design and Retailing Department at Framingham State University and was displayed on campus from September 16th through September 27th.

If you contributed a piece I hope you find it in the pictures below. Mouse over each picture for additional information and links to larger photos.

A special art installation collaboration and exchange was arranged with Dr Julia Percival at the University of Surrey and 'The Perovskite Project'.
Yarn Graffiti

Yarn Graffiti

Tree #3 (view 3 of 4)

Larger Photo

Yarn Graffiti

Yarn Graffiti

Tree #3 (view 4 of 4)

Larger Photo

Yarn Graffiti

Yarn Graffiti

A nod to the bustier designs that our students love to do!

Larger Photo

Yarn Graffiti

Yarn Graffiti

Granite post #1 (view 1 of 2)

Larger Photo

Yarn Graffiti

Yarn Graffiti

Granite post #1 (view 2 of 2)

Larger Photo

Yarn Graffiti

Yarn Graffiti

Granite post #2 (view 1 of 1)

Larger Photo

Madison

Saturday, August 24, 2013

This project started over a year ago, involved a few coast to coast visits and took A LOT of size adjusting before it was finished. However, the time, the energy and the effort were well worth it because the result was perfection for both me(execution) and Sarah(fit).

The Pattern:
The project started March 2012 during a visit with my daughter Sarah who lives in Seattle. Close by to her in Wallingford is Bad Woman Yarn, a well stocked local yarn shop and we like to pop in for a visit whenever I'm in town. On display, at the store's entrance, was a poncho that caught Sarah's attention. Sarah is always cold at her work office and was looking for something more stylish than the blanket she was currently using. The poncho was Madison by Martin Storey from Rowan's City Retreat book. The sample was knit with yarn that needed to be hand washed (not going to happen!) so we started looking for a superwash substitute. Unfortunately, we couldn't find the right yarn on this visit so I bought the book with a promise we would continue the search at a later date.

Flash forward to December 2012 in Boston. Sarah was visiting and we finally had the opportunity to again shop for yarn. Success! We found a yarn and color she like with Cascade 220 Superwash in charcoal at Fabric Place Basement in Natick. Now to get knitting!

One of the things I LOVE about Ravelry is the ability to read notes from other knitters who have knit the same garment. You can head off a lot of frogging and reknitting by paying attention to the problems other knitters have encountered. The issue mentioned over and over again about this pattern was how large it was sized. That's to be somewhat expected with a poncho but just to be sure I took Sarah's measurements and compared. Boy am I glad I did! I wound up making a number of adjustments to get the fit we wanted.

The Adjustments:

Gauge: I settled on using the pattern gauge but first experimented with decreasing the size by using smaller needles. This didn't work for a few reasons: 1) The fabric became too stiff using smaller needles. 2) The size didn't decrease enough and 3) The recommended needle size was 7 but I achieved gauge with a 6 which is really unusual for me because I'm a tight knitter and almost always have to size up to get someone else's gauge. However, I think the real reason for the needle size difference was the yarn substitution and not because of tension.

Length and Width: In order to get the right length I needed to knit the medium size but that was going to make the width waaaayyyy too long. So I cast on for the medium size but knit the length following the small instructions AND I decreased the width even further by not knitting the first and last 22 row from the cable chart(for a total of 44 rows). I also skipped the first four set up and ending rows but that wasn't my original intention. That happened because with all the pattern readjusting I started working right from the chart and missed the instructions for the first four rows and therefore needed to match the pattern by omitting the last four rows.

Blocking is a MUST to get the stitches uniform, the cabling pattern to line up
and most importantly to make the border flat and straight.

Cuffs: An interesting design feature of this poncho is the addition of an elongated cuff. Before starting the cuffs I steam and press blocked the body of the poncho. My blocked piece before adding the cuffs and borders measured 39" x 43". By now I had made so many adjustments that I wasn't absolutely positive what size cuff to cast on for or how long to make them. Luckily Sarah was back for a work visit in March and I was able to have a fitting and finish everything. I did a LOT of trial and error and frogging with the cuff to get everything comfortable. In addition, I made the cuff even longer and transitioned it into a fingerless glove.

Final cuff adjustments:
  • Cast on for the medium size (54 stitches) using size 7 needles and knit in the ribbing for 1". This is what worked to make the very top part of the cuff large enough so it didn't bind the arm.
  • Changed to size 6 needles and knit until the cuff measured 6". Switching to a smaller needle after the first inch help start the tapering for the arm.
  • Decrease one stitch at the beginning of the row and one at the end. Knit another 1".
  • Decrease one stitch at the beginning of the row and one at the end. (50 stitches left)
  • Knit until cuff measures 11 3/4"
  • Make thumbhole by binding off 4 stitches at the appropriate side of the cuff. Remember to work a left and right thumbhole (something I didn't do on the first pass!!!)
  • Continue knitting, (casting on 4 stitches over the cast-off thumbhole stitches) until the cuff measures 12 1/2"
  • Bind off in ribbing.


  • Knitting the poncho's body (once I had calculated how long I needed to make it) went smoothly. The cable pattern was easy to memorize and work. The cuffs took some time to get the fit right but were a quick knit once I had that worked out. This project was a reminder that even with a garment as shapeless and sizeless as a poncho you still need to measure and fit!


    Ravelry Project Page

    Community Art Installation

    Tuesday, July 16, 2013

    Your Participation is Requested

    The faculty, staff and students of the Fashion Design and Retailing Department at Framingham State University are promoting and celebrating the creation of our new department by inviting all knitters and crocheters to participate in a community art installation.

    Please help us by contributing a knitted or crocheted piece that will be used to blanket the trees, benches, posts and other objects on the campus commons.

    Everything on the Framingham State University commons
    has the potential to be graffitied with yarn!

    Knit or Crochet

    Pieces can be:
  • Any shape - squares, rectangles, triangles, and circles, etc.
  • They can be any color, any pattern, made with any type of yarn or thread.
  • Crocheted or knitted motifs (flowers, leaves, hearts, etc.) are also welcome for embellishment.
  • The best size is between 6”-8” in width and 6”-24” in length but all sizes are welcome.

  • Deadline

    September 6, 2013

    Update - 10/4/2013

    The Community Art Installation was a huge success! Thank you to everyone who participated.

    Read about it here - Yarn Graffiti at Framingham State University

    Cool Tie / Neck Cooler

    Sunday, July 07, 2013

    A few years ago I made neck coolers for my sister who lives in Fresno, California (where there are more days when the temperature is over 100 degrees than I want to even think about.)  Today in the Boston area, we are in our 5th day of a heat wave and it seemed like a good time to write up my notes for these neck coolers (also known as cool tie) - which, by the way, work really, REALLY well!

    Neck coolers are very easy to make. The hardest part is finding the polymer granules. I ordered 2 pounds of the medium 1-2mm polymer from Watersorb and that's enough for more neck coolers than I'll ever want to make. Luckily, there are a few other projects they can be used for. They can be added to soil for water retention (this might be helpful for those houseplants I keep forgetting to water!)  The crystals can also be warmed in a microwave (once they have been soaked) and used for heat pads -I'll save that project for the winter.

    There are a few ways to make neck coolers and these sites have good instructions:

  • Sew a Fast & Easy Cool Neck Scarf
  • Polymer Cool Neck Bands (This site sells the crystals)
  • Neck Coolers

  •  And, as usual, I came up with my own! Here are mine :


    1. Fold in half a piece of cotton fabric around 45" long and 4" wide.


    2. Measure 7½"  from the center back and mark points. Sew seams from the corner to these marked points with ¼" seam allowance.   This step is represented with the red dashed lines.
    3. Turn the fabric and stitch the pockets (make sure that the edges of the open seam are folded to the inside). This step is represented with the green dashed lines
    4. Load the granules into the three pockets - a scant 1/4 teaspoon in each is all it takes. Trust me, don't use more than the recommended amount - the first cool tie I made had that stuff oozing out of the fabric because I just couldn't believe such a small amount would balloon that much! 
    5. Top stitch the outer edge closed.


     When giving as a gift I print a card with these instructions:
    Soak the cool tie in water for 15-20 minutes or until the granules have reached the desired expansion.  As the polymer granules soak up the water "mush" them around so the polymer spreads out equally along the tube.  Tie around your neck.

    Wear the Cool Tie around the neck or head and it will bring great relief from the heat! Keep one in a refrigerator or ice chest and as soon as the one being worn reaches body temperature, exchange it with the one in the cooler.

    Store in a ziplock bag in the refrigerator, or hang to dry. The cool tie will rehydrate again using above instructions.
    Here's to keeping cool!

    The Perovskite Project

    Wednesday, July 03, 2013

    I love participating in art installations (Mini-me and redsweaters.org were a couple of my favorite contributions).  So when I discovered The Perovskite Project at the University of Surrey in England. I knew I HAD to participate. I rummaged through my stash, found the required yellow and blue yarn, and immediately started.

    The pattern calls for a dk weight yarn but the only blue and yellow yarn I found in the stash was Red Heart Super Saver - worsted weight, so right off the bat I was going to have to do gauge adjustments on both the octahedron and the central atom.


    My Notes for the central atom :
    Crochet hook: 3.5mm / E
    Yarn: Red Heart Super Saver - Bright Yellow

  • The pattern is written using English crochet terminology. However, the only adjustment needed was to translate double crochet as single crochet.

  • I kept the same crochet hook size (rather than size up for the yarn).  It produced a firmer fabric which should hold the shape well.

  • I worked increase rows until I had 24 stitches (through round 5). I got a measurement slightly over 4 cm across.

  • I used the invisible decrease to work the last half of the sphere. The invisible decrease is a great technique and makes an incredible difference in how crocheted balls look. You can find a good tutorial about it here at Planet June. 


  • My Notes for knitting the octahedron:
    Knitting needles: size 4
    Yarn: Red Heart Super Saver - Royal

    Unfortunately, there was no way I was going to get 10 stitches to 3.5 cm with the worsted weight yarn and no matter how I tweaked the pattern I couldn't get an equilateral triangle by increasing from a point. In a last ditch effort, I tried getting one by starting with a base and decreasing to a point. VoilĂ ! I could finally make equilateral triangles a little bigger than 7 cm. 

    The pattern that worked for me (and hopefully will help someone else) 

    Stitch definitions:
    ssk (slip, slip, knit) = Slip the first stitch as if to knit, slip the second stitch as if to knit, then slide the left-hand needle into the front part of both stitches and knit them together.

    p2tog (purl 2 together) = Insert the needle through two loops, like you were purling a single stitch. Purl the 2 stitches together as if they were 1 stitch.

    Cast on 14 sts  
    Row 1: Purl (I purl this row because I use the long-tail cast on, which is essentially knitting the first row)
    Row 2: Ssk, knit across. 
    Row 3: P2tog, purl across. 
    Row 4: Knit. 
    Row 5: Purl. 
    Row 6: Ssk, knit across.
    Row 7: P2tog, purl across. 
    Repeat rows 6 and 7 until you have one stitch. Finish off.


    My Notes for assembling the octahedron:
  • Using cardboard not only "blocks" the triangles to the right size but it provides the shape as well. I used a fairly lightweight cardboard from a frozen pizza box. The cardboard was flexible enough that I could poke a sewing needle through and tack down the three corners of the knitted triangle but it was firm enough to keep its shape without bending.

  • The cardboard triangles are 7cm and when I stitch them to the knitted pieces I'm centering and stretching the knitted pieces to leave space to sew a seam (see above photo).

  • The instructions state: "create defined edges by sewing the pieces wrong side together with the joining stitches on the outside of the piece". I think this means to put the seam allowance on the outside of the octahedron but I couldn't create a nice looking outside ridge when stitching this way (maybe because I knit the squares from the base down??) I figure the important feature is to have defined edges and I wasn't having any problem with that because the cardboard and the inside seam allowances created a clear shape.

  • In fact, I was getting such great structure that I debated with myself about stuffing it. I did decide on stuffing because these pieces will be doing some traveling and the stuffing will provide a cushion.


  • I have until August 31 to get a bunch of these knitted, crocheted and shipped off to England.  I'll take more photos and make updates along the way.  I'll also post links to the final installation when they're available.

    Hmmmm, these colors are also the colors of Boston Strong. I may have to find a project for that as well!

    Update:The knit Perovskite crystal structure has been completed! Information about the finished project can be found at the University of Surrey on the About the Project page and at Facebook on The Perovskite Project page.

    Travel Knitting Game

    Saturday, June 08, 2013

    I'm getting ready to coast hop today and coincidentally it's World Wide Knit in Public Day.  So I've set up a knitting project and being inspired by the Knitty Chaos pattern and Dicey Knitting, I decided to add a random element to this project.

    Many years ago, when I knitting socks, I ordered the Fancy Feet Anklets Kit from Knit Picks and I never got around to knitting any of them. I may someday get back to sock knitting but I'm not going to make these. Even when I wear socks I don't wear anklets so what was I thinking when I bought the kit? I have no clue.

     Anyway, I now have 7 different colored skeins of cotton fingering weight yarn and want to get them out of my stash. After a few hours of pattern searching over at Ravelry, I decided on the Mini Mania Scarf. It's a perfect travel pattern with an easy to memorize repeat, worked on circular needles and it'll take a while to finish. But then I thought ...... dang, how do I pick the colors? This pattern was written for left over amounts of yarn that involves no real amount of color thinking. That's when I remembered the Chaos pattern --so here goes:

    Supplies:
    7 unused skeins of Knit Picks Comfy Fingering from the Fancy Feet Anklets Kit
    Size 6 circular needle

    Instructions:
    Step 1: Put all the skeins in a bag and without looking pick one.
    Step 2: Cast on 600 stitches(Yes, I'm going for the EPIC version!)
    Step 3: Work 2 rows of the pattern.
    Step 4: Without looking, pick a skein from the remaining ones in the bag.
    Step 5: Work 2 rows of the chosen color and then roll the dice
                 ---if even number -- go to step 4.
                 ---if odd number -- knit another row of the same color and then go to step 4.
    Step 6: Repeat Step 5 until all colors have been used. Put all skeins back in bag. 

    Repeat steps 5 & 6 until scarf reaches desired width. 

    Step 6 is where I have doubts. Do I use all the colors and then repeat? Do I put the skeins back each time? Do I work only three or four colors and them put them back? Help me please! I think any of the three choices would work but I can't decide.