
This project started over a year ago, involved a few coast to coast visits and took A LOT of size adjusting before it was finished. However, the time, the energy and the effort were well worth it because the result was perfection for both me(execution) and Sarah(fit).
The Pattern:The project started March 2012 during a visit with my daughter Sarah who lives in Seattle. Close by to her in Wallingford is Bad Woman Yarn, a well stocked local yarn shop and we like to pop in for a visit whenever I'm in town. On display, at the store's entrance, was a poncho that caught Sarah's attention. Sarah is always cold at her work office and was looking for something more stylish than the blanket she was currently using. The poncho was Madison by Martin Storey from Rowan's City Retreat book. The sample was knit with yarn that needed to be hand washed (not going to happen!) so we started looking for a superwash substitute. Unfortunately, we couldn't find the right yarn on this visit so I bought the book with a promise we would continue the search at a later date.
Flash forward to December 2012 in Boston. Sarah was visiting and we finally had the opportunity to again shop for yarn. Success! We found a yarn and color she like with Cascade 220 Superwash in charcoal at Fabric Place Basement in Natick. Now to get knitting!
One of the things I LOVE about Ravelry is the ability to read notes from other knitters who have knit the same garment. You can head off a lot of frogging and reknitting by paying attention to the problems other knitters have encountered. The issue mentioned over and over again about this pattern was how large it was sized. That's to be somewhat expected with a poncho but just to be sure I took Sarah's measurements and compared. Boy am I glad I did! I wound up making a number of adjustments to get the fit we wanted.
The Adjustments:
Gauge: I settled on using the pattern gauge but first experimented with decreasing the size by using smaller needles. This didn't work for a few reasons: 1) The fabric became too stiff using smaller needles. 2) The size didn't decrease enough and 3) The recommended needle size was 7 but I achieved gauge with a 6 which is really unusual for me because I'm a tight knitter and almost always have to size up to get someone else's gauge. However, I think the real reason for the needle size difference was the yarn substitution and not because of tension.
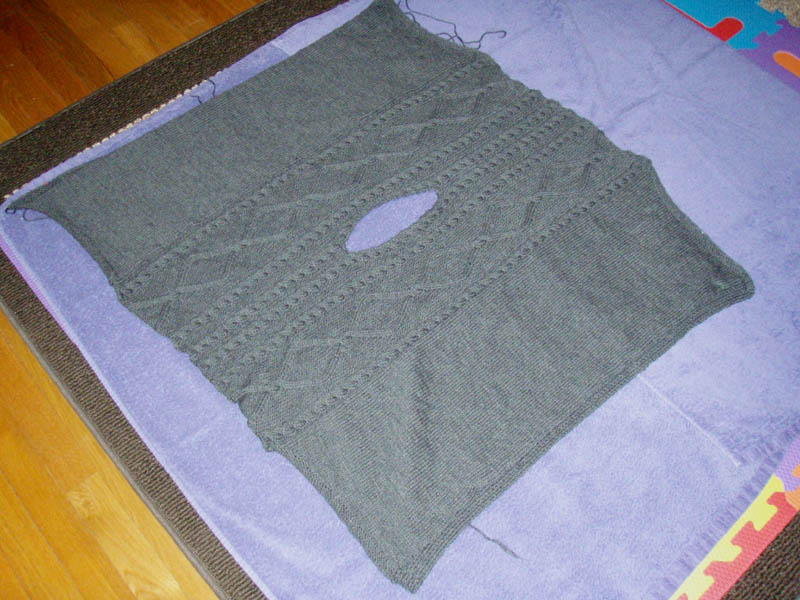
Length and Width: In order to get the right length I needed to knit the medium size but that was going to make the width waaaayyyy too long. So I cast on for the medium size but knit the length following the small instructions AND I decreased the width even further by not knitting the first and last 22 row from the cable chart(for a total of 44 rows). I also skipped the first four set up and ending rows but that wasn't my original intention. That happened because with all the pattern readjusting I started working right from the chart and missed the instructions for the first four rows and therefore needed to match the pattern by omitting the last four rows.
 |
 |
|
Blocking is a MUST to get the stitches uniform, the cabling pattern to line up and most importantly to make the border flat and straight. | |
Final cuff adjustments:

Knitting the poncho's body (once I had calculated how long I needed to make it) went smoothly. The cable pattern was easy to memorize and work. The cuffs took some time to get the fit right but were a quick knit once I had that worked out. This project was a reminder that even with a garment as shapeless and sizeless as a poncho you still need to measure and fit!
 |
 |
Ravelry Project Page


